How to create/open a blogger account? Step by step guide line with pictures
How to create/ open a blogger account?
I'm glad to see you here. Because, you have shown your interest in creating a blogger account. Welcome, let's start your blogging journey…….
Blogging has
become a popular way for individuals to express themselves and share their
thoughts, ideas, and opinions with others. Blogger is one of the most popular
blogging platforms available, and it's a great choice for those who are just
starting out in the blogging world. In this guide, we'll take you through the
step-by-step process of creating a blogger account.
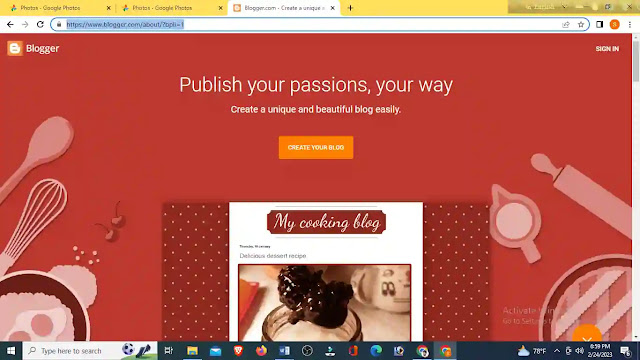
Step 1: Go to the Blogger website
The first
step in creating a blogger account is to go to the Blogger website. Type
"blogger.com" into your browser's address bar and hit enter. You'll
be taken to the Blogger homepage, which will give you an overview of what the
platform is and how it works.
 |
| blogger homepage |
You can click on this link "blogger.com" to go to blogger homepage, but you should read the whole article first and it will be good for you.
Step 2: Sign in with your Google Account
To use
Blogger, you'll need to sign in with a Google account. If you already have a
Google account, click the "Sign In" button in the top right-hand
corner of the screen. If you don't have a Google account, click the
"Create Your Blog" button in the center of the page.
Step 3: Create a New Blog
Once you've
signed in, you'll be taken to the Blogger dashboard. From here, you can create
a new blog by clicking on the "New Blog" button in the top left-hand
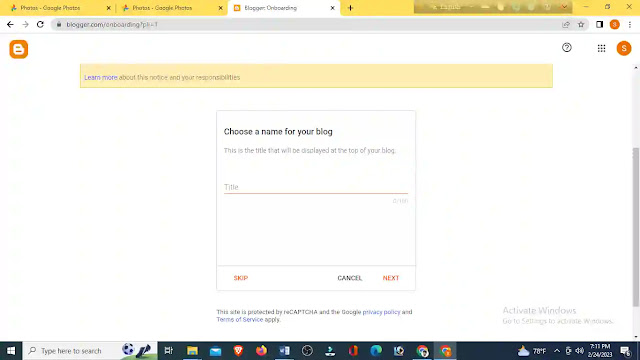
corner of the screen. You'll be asked to give your blog a name and a URL. Your
URL is the web address that people will use to find your blog, so choose
something that's memorable and easy to remember.
Write a Title for your blog on this step
After this you will aske to write your URL.
Step 4: Choose a Theme
Once you've
created your blog, the next step is to choose a theme. A theme is the design
and layout of your blog, and there are a variety of free and premium themes to
choose from on Blogger. You can browse through the themes to find one that
suits your personality and the tone of your blog. You can also customize your
theme further by changing the colors, fonts, and adding widgets.
Step 5: Customize Your Blog
After you've
chosen your theme, it's time to customize your blog. This is where you can add
widgets, change the colors and fonts, and add pages to your blog. You can also
upload images and videos to make your blog more engaging. This is the stage where
you can really make your blog your own and create a unique online presence.
Step 6: Publish Your First Post
Once you've
customized your blog, it's time to publish your first post. Click on the
"New Post" button in the top left-hand corner of the screen. Give
your post a title and start writing your content. You can add images and
videos, format your text, and add links to other websites. Once you're happy
with your post, click the "Publish" button, and your post will be
live on your blog.
Creating a blogger
account is a straightforward process that can be completed in just a few
minutes. However, it's important to take the time to customize your blog and
make it your own. Choosing the right theme and customizing it to your liking
can help you stand out in a crowded blogosphere. Additionally, regularly
publishing quality content can help you grow your audience and establish
yourself as an authority in your niche.
Creating a blogger account is a great way to get started in the
world of blogging. By following the steps outlined in this guide, you can
create a blog that reflects your personality and interests. Whether you're a
hobbyist or a professional blogger, Blogger is a user-friendly platform that
can help you share your ideas and connect with others online. Happy blogging!
Attention:
Regularly various job circulars are published on our website (Heart Academy) for various job exam preparation. So please visit our website regularly. Web address: www.heartacademy.xyz. Click the social media icon below to remember, save the text to your timeline or share it with your loved ones
......... Thank you.
Heart Academy


No comments